Showing posts with label diy and projects. Show all posts

Wednesday, February 22, 2012

Made: a photobook


The idea was simple enough: make something for Valentine's Day unlike the things I've made before.  That idea then stretched a little--make something that isn't just for Valentine's Day, but something that can be special every day.  That's a nice tall task.  Still, the idea took on a form.  I would document my day, those little mundane things of my Monday to Friday life, print them, and put them in a book I would make myself.  Then my husband, when he's at work all day for the long hours of busy season, can find a picture of what I'm probably doing at that moment, and in a little way, I am with him.

Supplies:
decorative paper (for the cover), heavy paper (for the pages), masking tape (mine was 1/2 inch wide), printed pictures (mine were printed on regular paper so they wouldn't be too thick)scissors, glue, cardboard or chipboard (for the cover), ribbon, stamps, and embellishments, calligraphy pen

Steps:
Print the pictures.  Glue them to the heavy paper in chronological order.  Use the masking tape to bind the pages to each other.  Cover the chipboard or cardboard with the decorative paper, then use the masking tape to bind it to the pages.  If you want to attach a ribbon to tie the book closed, glue the ends of the ribbon under the decorative paper on the inside of the cover.  Once the book is put together, you can stamp and embellish to your heart's content.  You might want to label the pictures, too.

Friday, June 24, 2011

another DIY :: five minute headband

Sometimes I browse Pinterest for ages, searching for inspiration and then discovering that I've used up all of my free time looking through all of the great things posted over there.  But last night, I decided to go ahead and just make one of the quick projects I spotted.

The project is by Kelli of Presser Foot and this picture is the one that caught my eye.


Here's my completed project.  It really did take five minutes.  My only recommendation is that you could use less than a yard for each piece of rope (or yarn, in my case).  I cut off about ten inches' worth from the ends once I'd sewn them together.  But it's better to have a little extra than not enough, I suppose.  I also finished the ends a little differently--I wrapped the fabric around the yarn.  


I like the results, and it's a headband that actually fits me.  I love headbands but don't often buy them because they are usually too small and give me a headache, so making one is my usual solution.  This project is just as easy and a little more interesting than the fabric bands I usually make.  Get off the computer now and try it!


Wednesday, June 22, 2011

DIY :: recycled feedbag backpack

I decided to make a backpack myself instead of buying a new one.
Thankfully, it turned out well.  With the lining, it feels durable enough to carry my books and laptop, and the size is just right--big enough for a decent amount of stuff and small enough that it doesn't feel ridiculous.  I sprayed it with scotchguard for a little extra protection and I think it's just right now.


You can make one, too.  You just need to know how to do a few things: sew a relatively straight line, sew a buttonhole (or have a machine that does it for you), stitch in the ditch, and attach a button.  For supplies, you need an old feedbag (or any large-ish sack, or just make one yourself from any fabric), a strong material for straps, buttons, and any embellishments you'd like.

Here's the basic outline of the construction of the bag.  Photos of the process, along with the descriptions of each step, can be found here.


{the images should get bigger when you click them}

It's been awhile since I joined a link party for DIY, so I popped over to Momma Hen's Coop and linked up with her Whatever Wednesday series.  It's always a good way to find a few DIY posts!

Wednesday, May 4, 2011

woolly branch centerpiece: a tutorial

I meant to post this on Friday last week, but then we went to Louisville and I was thinking about other things, so it's a bit late.  But then, anyone who knows me well can tell you that being late is sort of common with me.  I mean, I'm good about getting to work or to class on time (or very, very close to it), but if you're planning to have dinner with me at six, be ready to wait until five after (or even quarter after) the hour before seeing me.


Besides, do you ever really remember when bloggers say they'll post something next week or the week after?  I know that I don't.  Maybe that's just me and an early onset of those senior moments my middle school history teacher used to claim to have.  If I'm having them at twenty-two, though, I'm a wee bit concerned for the future.

Oh, what's that?  This is supposed to be a tutorial and not a stream of consciousness narrative concerning my momentary memory lapses?  I've done it again.  Here is a very simple project that looks very pretty in real life.  The photos confirm the great need for more sunshine and better light in the month of April here instead of ten-plus inches of rain.  Thank goodness the sun came out on Friday and Saturday!


It really is that easy.  Happy wrapping!

You may have noticed that I didn't use wool in this woolly centerpiece.  However, wooly sounds better than yarn-y (or does it?) and even though this was an acrylic yarn, it still has a bit of a wooly look.  I'm also allergic to wool, so I generally don't use any wool yarns.  Itchy reddish fingers, hands, and arms are unpleasant.  How's that for some great imagery?

Sunday, April 24, 2011

Happy Easter!


{an allergy friendly Easter centerpiece: yarn wrapped branches, an empty spaghetti sauce jar, kraft paper with hand drawn polka dots and gel pen writing, and tags from Eat Drink Chic (in black and white because I have no color ink at present).  more pictures and a tutorial to come next Friday.}

Thursday, April 21, 2011

ventures into the blogosphere :: screenprinting tutorial at Lil Blue Boo

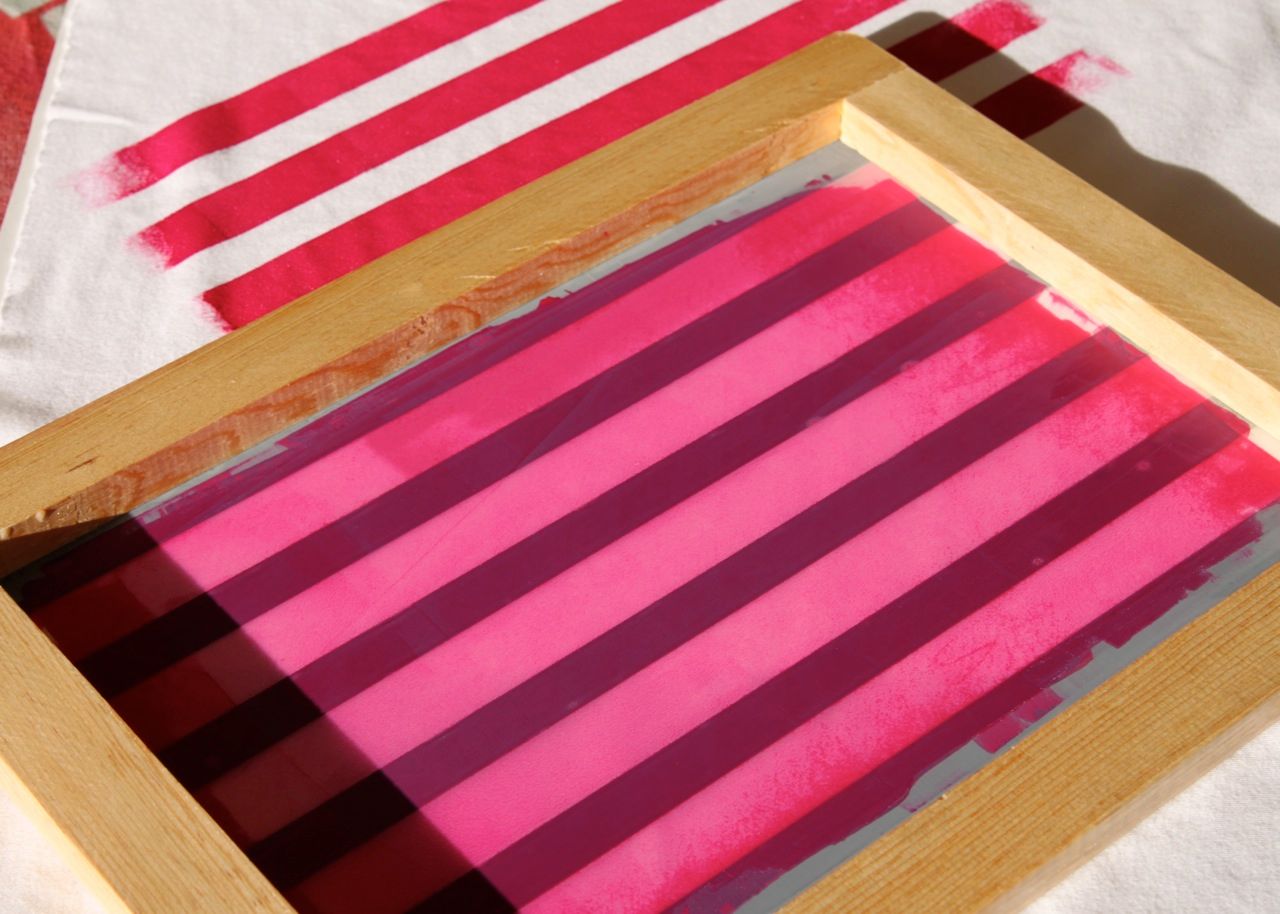
For at least the last year, I have wanted to try my hand at screenprinting.  I haven't had time to take a class and there's no way I'm going to try it in a completely carpeted rental, even if this kit at Urban Outfitters has been teasing me with its all-your-supplies-together-ness. There are a million tutorials available that tell you how to screeprint, but I've always found them incredibly confusing, even the ones that claim to be simple, except for this one from Lil Blue Boo.  The materials are simple enough that I can get them at any craft store, and the method doesn't require anything too complicated or expensive.  Guess what I'll be doing this summer?


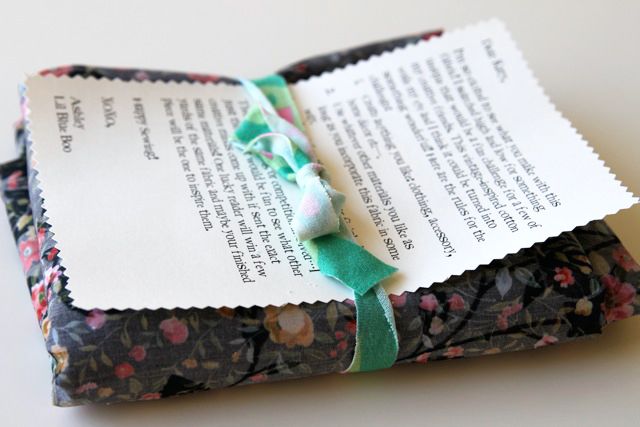
Lil Blue Boo is the internet home of Ashley, maker extraordinaire.  She paints, sews, prints, operates a clothing and pattern store through her website, and still has time enough to post clear and helpful tutorials.  Right now, she's doing a series of posts called "What would YOU make?" that features a bunch of different bloggers.  She sent a bundle of the same fabric print to each of them--a darkish floral number--and asked them to create their own pieces from it.  All the different creations from the same fabric are so interesting, because they are so similar and yet each one is completely unique to its maker.  I really like the premise of the project.  It'd be fun to do with all sorts of materials--maybe a packet of different papers, or a notebook and a pen, or some other limited number of raw materials.


If you have some time, take a look at her other tutorials, and maybe you'll find one you'd like to try, too. 

Have a lovely day!

Wednesday, April 20, 2011

"The amen of nature is always a flower." -Emerson


I completely missed sending out Christmas cards, and while I know a lot of people don't bother with them, I still wanted to.  But at the time, I was working full time at the university and part time at the movie store and had very little time to design, create, and mail a whole bunch of cards.  So I'm sending them out for Easter instead, and this has the added plus of a timely note to family and friends that we're moving.  I'm having the worst time getting good pictures today, ones that actually capture the soft pastel color of the cards, but a couple of these still turned out to be shareable.  I used the leftover paper from my graduation announcements, some green card stock paper, and a stamp my mom gave me for my birthday.  I'm sending these to friends and relatives that live out of town and out of state--the people I hardly get to see.


I love the quotation on the stamp, as noted in my title: "The amen of nature is always a flower."  While I often found Emerson to be a bit on the pompous and irrational side, I can't deny that he has a gift with turning a good phrase, and the thought captured in this one is perfect for this season.  If "amen" is taken for its meaning of "let it be" in addition to its more religious connotations, then we can read this phrase to mean that nature says "let it be" with these beautiful, delicate things that spring to life from the smallest seed.  
It is beautiful, no?

P.S. I'm linking here, here, and here.  The buttons are on the right.  Click them to see more projects by other bloggers!

Wednesday, April 13, 2011

making nice with my sewing machine

My sewing machine and I squabble sometimes, but it's never Janome's fault that many patterns are sized for girls with rectangular bodies (when you find one, let her know I've made a skirt that should fit her) and that I never measure twice and cut once.
But sometimes I make friends with Janome again, and we work out our differences and make pretty things.  I've learned it's best if I stick with plain shapes, like rectangles, squares, and the occasional buttonhole.  This time, though, I managed some gussets, of which I'm quite proud.  I'd write you a tutorial if I had made it in a way that was logical and could be recreated, but any directions I give you are liable to get your sleeve sewn to your bag (almost happened) and leave you ripping out seams every fifteen minutes (did happen).  Instead, I'm sharing only the finished product, with adjustable straps inspired by this tutorial spotted on pinterest and a little bit of pattern mixing.

{straps button on at two different lengths}

{fully lined}

{gussets!}
{altogether+overstuffed bookshelf}

I've gotten a lot of blurry shots lately.  I think I need to get a tripod.  I really want a DSLR camera and a class on using it well, but that doesn't seem likely to happen in the near future.  Still, if I find a great price on at least the camera, well, I'll figure out the class.  In the meantime, I'll keep waiting and hoping for sunny days, which are getting more common now that winter's over.


It's a whatever Wednesday on Momma Hen's Coop, so there's a button in this post.  You should look at this table she rescued and prettified with paint.  It's also a plus that she's from Kentucky.

Wednesday, March 23, 2011

special feature: a washi tape project

This funny thing happens when you actually look at your blog archives: you find posts you forgot to actually, well, post.  Is there a way to phrase that sentence without being so redundant and repetitive?

Sorry.  I'll stop with the wordy puns.

So here's a post I wrote in the early fall, and never published (ah, yes, that is the right word!).  It's sort of a how-to just for you.  I did update the dates and such, now that C. and I have been married almost a year (when I first wrote this post, it had been two months).

Last summer, my husband of ten months and I celebrated the second anniversary of our first date.  It was an awkward date, as all tend to be, but grew more comfortable as we sipped white chocolate mochas (in July, I know!) and talked for over five hours.  We then parted for two weeks, which would soon prove the longest we would stay apart.

Over the past two-plus years, we have celebrated some momentous occasions--a wedding, a proposal, I-love-yous, and a first kiss, though not quite in that order--and I wanted to celebrate.  So, drawing inspiration from all the amazing washi tape projects I've seen around the blogosphere, I created a simple-yet-special card to give my husband.

I started with some blank notecards.  I bought a pack of 200 at Target a few months ago, in all different soft shades, which have proven enormously useful.


On each notecard, I wrote down the date of an occasion, a little title, and a few words of description.  I also stamped little hearts under each date, with the number of hearts correlating to the event's place in chronological order.  I chose eight different days, starting with our first date, and ending with our anniversary.  But it would be very simple to extend or shorten the number of cards you use.


I then attached the matching envelopes to each other with a glue stick (acid free), then wrapped washi paper tape around the top and bottom to secure the attachment, since the glue sticks aren't super duper strong and washi tape is far more pretty.  I had a marker with a heart stamp on one end and did a border above and below the washi tape.  I tucked the ends of the top piece of washi tape inside the envelope so that it appears seamless.  Then I just set the cards into their own little pockets and they were ready to go!


It's so fun to look at the cards and remember all the big days of our relationship, but it also reminds us of all the happy little days in between.  Enjoy sharing the same memories with your special someone!

Best,

Katie

p.s. this project seems to coordinate well with my new blog's colors.  hooray for slight success in matching!


p.p.s. I'm submitting this for the itssoverycheri blog's project party, hence the button at the end of this post.  Cheri has a nifty tutorial on making fabric tape, so you may want to check it out.


Saturday, March 5, 2011

ventures into the blogosphere :: getting crafty with Poppytalk Handmade

I'm always looking for good DIY projects, things that you can personalize  and make your own, and this project, a guest post by Janis Nicolay of Pinecone Camp is most definitely of that sort.  Poppytalk Handmade is a site with that wonderful wabi-sabi aesthetic ever-present, so it's no surprise that I would find something I love here.  I don't know if the style in this project would fit well with my home in the style shared here, but I have some old wall paper found at the thrift store (formerly used to cover a headboard found on the side of the road) that just might work.  You could also use some odds and ends for this project--maybe the cover of a takeout menu with a pretty design or some wrapping paper.  I'd advise against any newspaper, though--with mod podge, the ink tends to run, I've learned.  You could always photocopy something, though, if you want that kind of a look.

poppytalk: Getting Crafty in Chinatown!


{Image by & belongs to Janis Nicolay}

Tuesday, February 22, 2011

an idea?

I saw this on Annekata:


and I saw this the other day on Grosgrain Fabulous:

So what about combining the two projects?  Using knits, maybe taken from some tshirts (thrifting trip and a bit of fabric dye experimentation may be required), to make a simple dress?  It'd take a bit of work to find a shirt long enough, but an extra-extra-large men's shirt could do it, I think?  I do think I'll have to give it a go next week.  I'm not sure how I feel about the idea of hiking in a dress, but a just-above-the-knee-length version of this, with a higher waist, is kind of what I have in mind.

Monday, February 7, 2011

swapping (or, why I really need to learn to sew a straight line)

Hello, my name is Katie and I am a colossally inadequate Craftster swap buddy.

I am kind of sort of in awe of the generosity of my swap buddy.  She not only stitched this ridiculously adorable needlebook, but when we talked about swapping other supplies that we have sitting around, she sent me three, yes THREE awesome stamp sets. Super nice stamp sets. And she paid for the shipping for all three, which makes me a little in awe, since I winced at the price of sending my rather humble package of fabric and a few notions all the long way to Canada (of course, that might have had something to do with paying rent the same week?).

Anyway, my slightly-embarrassing effusions aside, here's what I received.


ummmm...wow, thanks!!!!!!  My swap buddy was whats_her_name, who happens to be quite talented, and I guess I'm just a lucky duck today.  It was a super nice surprise after one of those classic crap Monday sort of workdays.  Also, how darling is that card? And how stinking clever to use a rubber stamp for an embroidery pattern as well?  It makes such sense!

p.s. ms. whats_her_name, if you happen to read this, I do hope my package gets to you quite soon, though it's not nearly as impressive.  I did try to pick things that went well with the sorts of projects you've posted before, though!

p.p.s. If I have the time and money this summer, I am going to both purchase a for-real camera and take a photography class so you no longer have to deal with my crappity-crap over/under/oddly exposed and randomly shiny with a tendency to blur photos.

p.p.s. I have been feeling exceptionally verbose lately.  Sorry.  Also, I am Katie-Bee on Craftster as well as in the rest of my life, in spite of now having a last name that starts with an S.

Monday, January 31, 2011

DIY :: "not your grandmother's doily" shirt

I, like the creator of this project, occasionally pick up doilies from thrift shops.  I've made purses from them, remember?  Well, here's another way to use them, and it's pretty clever.  In fact, this might be a project I'll actually do, rather than just post, once I find the right doily to use.


{Image from Trey and Lucy}

So, pop on over to Trey and Lucy, and try this project for yourself.  Then take a look at the great collection of craft tutorials Tanya had posted.

Sunday, January 9, 2011

plaid shirt redux


kid's plaid shirt + pinking shears + zipper and cotton = birthday present, to be featured later, upon receipt by the birthday girl.

Saturday, January 8, 2011

a saturday morning how-to

Good morning--or, well, afternoon, but if I'm still in my pajamas, can I call it morning?

Last weekend, I had a flurrying moment of creative cleaning.  It didn't last long, and the results are limited, but I'm going to share them with you here in a little project.  All you need is a rectangular piece of fabric, probably around a foot wide and maybe a yard long, a sewing machine, and some sort of drawstring (I used a piece of cotton ribbon that had once wrapped the kitchen towels from our wedding registry).  For the fabric, I used a perfectly shabby chic table runner that I picked up for a dollar.

After a little fun in powerpoint, since I don't have photoshop or anything awesome like that, I put together a picture tutorial.  Here you go!


here's mine hanging out in the kitchen in which it is impossible to get good lighting...


I have the weekend off (hooray!), so there might be some more crafting coming up, like a birthday present for someone who is about to turn sixteen...but I guess I can't post that until she receives it ;).


p.s. You can click on the images and I they will get a bit larger so the font is easier to read.

Thursday, December 30, 2010

at present

This is how I feel.


{via the angry knitter, with whom I totally sympathize}


I have the needles (size 15).  I have the yarn (super soft boucle). I have the pattern.  But I can't do a purl stitch to save my life.  I've watched two videos and read five sets of instructions and really just need someone to show me how (Oma, want to make a trip to my little town?  I know you know how to knit like no other!  Kat, you can come, too) to actually do these stitches.

Or someone can come and tell me that I'm crazy to attempt an intermediate level project when I a) don't know a purl stitch and b) can't even knit a full scarf without randomly dropping stitches.  I suppose I'm hoping that if I take on a project to make something I'd actually like to make (a wrap), then I'll actually finish it, something else I am notorious for not being able to do.  Oh, yes, I can be an angry knitter.

I do believe this is why my mother told me never to start a new type of craft after nine at night.

Wednesday, December 29, 2010

a wintery how to: Annekata's Garbo hat

I always find the best tutorials on Kathrin's blog.  I think she would be an entirely interesting person to meet and sew with for an afternoon.  I feel like I could learn so much!

annekata: Greta Garbo and How to Make a New Hat


I have some scraps of upholstery fabric that would be great for this project, bought from a remnants table that was sold $3 a pound some time ago.  Wouldn't it be fun to make it from a patchwork and pair it with a scarf made from the same scraps?

Tuesday, December 28, 2010

a little bit of miniature flowers

My in-laws gave me this neat set: Mini Origami Flowers by Joost Langeveld...


...and I made a little cluster of roses.


It was surprisingly easy (my past efforts at origami have been less than impressive), and looks really sweet.  I liked that the paper was provided--this meant I could get going on a set right away, rather than waiting to go buy some origami paper.  Now I have flowers that will not set a chain reaction of sniffles, itchy eyes, scratchy throats, and empty boxes of tissues and hand sanitizer and a shortage of cough drops.

(Yeah, that's why we had silk flowers in our wedding.  They were also gorgeous, thanks to the sweet (and affordable!) creative florist at A Touch of Elegance.)

Thursday, December 23, 2010

holiday DIY of the day #22

It's gift wrapping crunch time!  Check out this round up of free printable gift tags on Creature Comforts.  Even when you're in that last minute rush to get everything under the tree for everyone you love, you can make a simple bit of wrapping or packaging personalized and sweet.  All you need is a printer, paper, and a pair of scissors.  I'd also grab a bit of twine or double stick tape to attach the tag.  My presents have these little tags, attached with baker's twine I bought from Packagery on Etsy...

{a blurry shot is the price I pay for leaving my actual camera at my parents' house and have to use my phone...but that's from the stamp I made from an eraser}

Tuesday, December 21, 2010

holiday DIY of the day #18, 19, and 20...

and 21 just for kicks...

{via Dottie Angel}


Oh, how behind I am!  Life has been so busy.  I graduated (summa cum laude! even if it won't post on my transcript due to a rule about having at least 60 credit hours at my university), visited lots of family, got beat twice by a comeback from my parents in Rook, welcomed the in-laws for good food and the most entertaining game of Apples to Apples ever played (don't play a card when you're the judge, Gram! ;) ), wrapped Christmas presents, and put in as many hours as I can fit into three days at both of my jobs.

zzzzz...

Anyway, here's a link to a project from Mrs. Eliot Books, a tutorial for making your own stamps from erasers that I followed and used for Christmas gift tags from Creature Comforts (so add making a rubber stamp to the list above), some pretty paper stitched stationery from Design*Sponge , and a felted sweater banner from Dottie Angel (you have to scroll down a bit to get to the tutorial itself).

I suppose that qualifies as a round-up, don't you?

Now, to sleep.  Goodnight world!